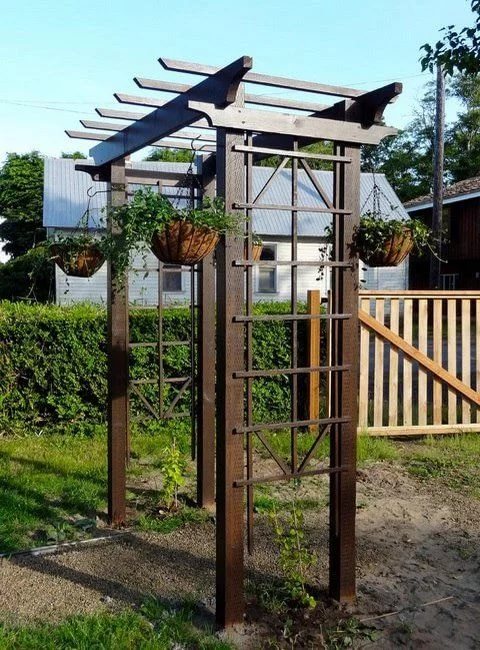
Building wooden pathways in your garden can quickly, inexpensively, and beautifully organize your plot. Wood is an environmentally friendly material with an attractive appearance and low thermal conductivity. Walking on wood is comfortable, pleasant, and enjoyable. Wooden pathways are known for their originality and variety of forms.
Even the fact that natural materials are susceptible to moisture is not an obstacle to deciding to build a garden pathway from wood. A significant advantage of such a project is that every household has enough boards, beams, and slats that have been lying around for years. By building a pathway from wooden slices, you can usefully recycle felled trees.
Design of Wooden Pathways

Today, there are many options for arranging these engineering structures. They are made in various lengths, widths, and configurations. The only limitation for construction is moisture. Pathways should not be laid in low areas where rain and groundwater constantly accumulate. Frequent wetting quickly destroys the wood.
To properly arrange your plot, follow these recommendations:
- In the depths of the garden between trees, do not make wide paths. A width of 40-50 cm is sufficient for one person to walk comfortably. Wider paths will look awkward and take up useful space.
- In the center of the garden, build pathways at least 100 cm wide. This width is necessary for two people to pass each other comfortably and for the smooth movement of a garden cart.
- Slopes should be equipped with steps. Wood absorbs and retains water well, making it very slippery. Steps will make moving around the garden comfortable and safe.
When planning the beautification of your land, you can and should build paths in the following forms:
- straight;
- broken;
- winding;
- double;
- solid;
- patterned (ornament, parquet, sleepers);
- in combination with sand, stone, lawn grass.
To build a strong, beautiful, and durable pathway in your garden, you need high-quality raw materials in sufficient quantities and a set of functioning tools.
What is Needed for the Work

Typically, everything needed for such a task can be found in any shed or garage.
The following tools are required for construction:
- shovel;
- sanding machine;
- hand tamper;
- tape measure;
- nail puller;
- spirit level;
- gasoline or electric saw;
- hacksaw with large teeth;
- hammer;
- rubber mallet;
- screwdriver;
- paintbrush.
Remember that the constructed pathway will be used for many years. To ensure that this structure lasts a long time, it is necessary to carefully select the material for its manufacture. The raw material should be only dry wood without cracks and signs of rot.
Additionally, you will need:
- geotextile;
- gravel;
- sand;
- antiseptic;
- acrylic paint;
- deep penetration primer;
- bitumen;
- nails;
- screws.
You can save money by using used motor oil, leftover paint, and copper sulfate instead of factory-made impregnations.
Before starting work, all the wood should be treated in several stages. First, it is covered with an antiseptic liquid. After the blanks have completely dried, they should be painted on the front side in the chosen color. Once the paint has dried, the blanks are immersed in used oil, paint, or heated tar. Such preparation will protect the wood from the effects of moisture for several years.
Making a Board Pathway
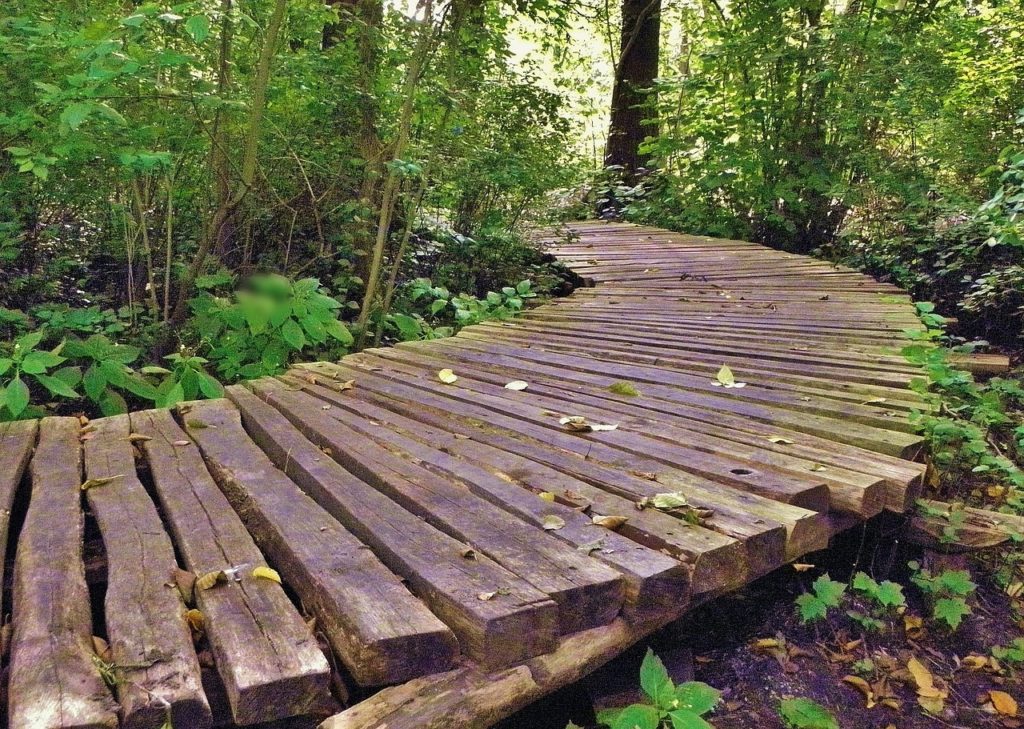
Board pathways are made in several variations. The slats can be laid longitudinally, transversely, or diagonally. On one pathway, different laying options can be alternated, changing the color of the coating. Boards can be laid in the ground, placed on its surface, or laid on supports.
Let’s consider how to make the most complex structure – a pathway raised above the ground.
It is made in the following sequence:
- Mark the layout on the site. For this, use a tape measure, level, stakes, and string. Mark the locations of the steps separately. On straight sections, 2 m between stakes is sufficient. In curved areas, the distance should be reduced to 30-50 cm.
- Along the marked contour, remove the top layer of soil and dig a trench 20 cm deep. Clean the bottom of the trench from plant roots, level and compact it. Dig out the steps.
- Lay a strip of geotextile fabric in the trench. Cover it with 10 cm of gravel and 10 cm of sand. Moisten, level, and compact the cushioning layer. This will prevent the base from washing out and plants from growing under the boards.
- Lay the supporting beam on top of the cushion. Depending on the curvature of the pathway, the assembly is made from blanks of different lengths. The beam is fastened together with metal strips or slats screwed from the inside. The number of guide lines is determined by the width of the pathway. If it is up to 50 cm wide, two lines of supports at the edges are sufficient. With an increase in width, add one support line for every additional 50 cm.
- Fix the boards to the beam. Leave a space of 5-8 mm between them. The gaps are necessary for water drainage, ventilation, and the expansion of the wood when it absorbs moisture. It is better to fix the boards with screw nails. These items are much stronger and more reliable than tempered screws. The edges of the boards can be left unprocessed or trimmed to the cut of the beam. This depends on the preferences of the plot owners.
The finished structure should be covered with paint or varnish immediately after assembly. Periodically, walk along the pathway and hammer down any protruding nail heads.
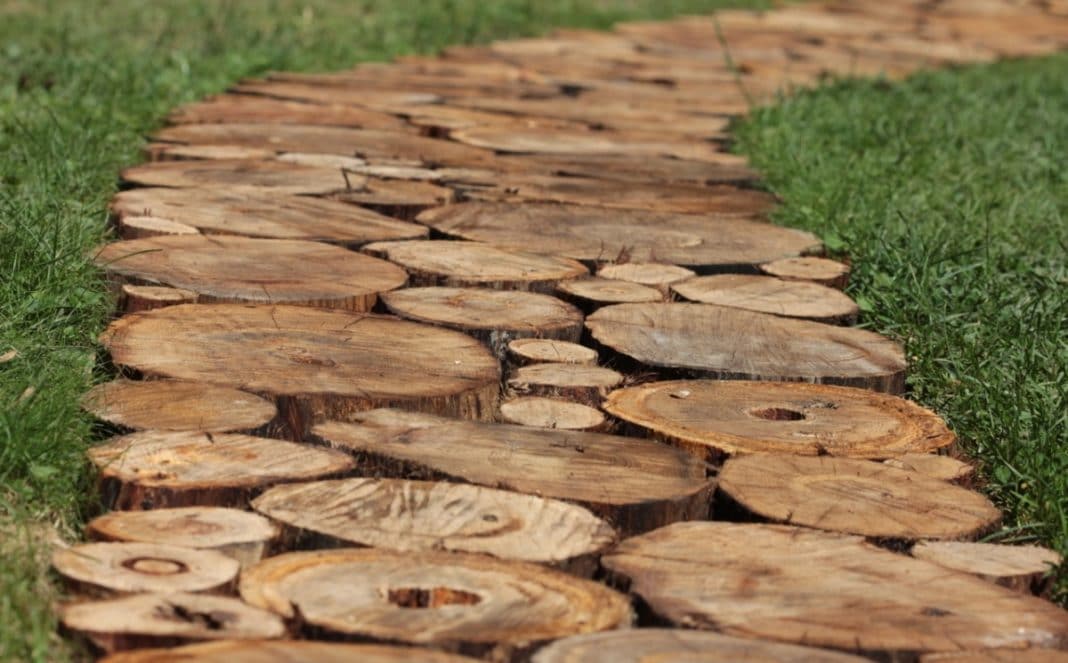
How to Make a Pathway from Slices
From logs of different diameters, original, convenient, and practical platforms and pathways are made. Slices can be prepared separately, or you can use firewood from a woodpile. The source of the material can be fallen or preventively felled trees. Not only trunks but also thick branches of plants are used. Slices from branches are good for filling gaps between large-diameter rounds.
Trees are cut into fragments 25-30 cm high. During preparation, try to make the cuts perfectly even. The rounds should be dried in a dark and cool place for at least six months. Otherwise, they will crack. Wet wood cannot be used in work, as it will shrink by 25-35% after drying, causing the structure to lose its presentability. After complete drying, the rounds are treated with antiseptic and moisture-proofing agents. The top part can be painted with copper sulfate or stain.
After preparing the blanks, the following measures are taken:
- Mark the contour of the future pathway. In the case of slices, it can be given the most diverse and sharp bends, providing for platforms and intersections.
- Dig a pit 10 cm wider than the project width. The depth of the pit should exceed the height of the slices by 10 cm. Thus, with an average height of 30 cm, the trench should be 40 cm deep.
- Lay a strip of dense polyethylene, tarpaulin, or geotextile on the bottom of the pit. The edges of the waterproofing should be brought above ground level. Cover the fabric with a 6 cm layer of gravel and a 6 cm layer of sand. Level and compact the cushion.
- Install the rounds. Do this in a random order so that there is a minimal gap between the blanks. Leave a gap of 3-5 cm between the logs and the edges of the trench.
- Fill the gaps between the logs and the walls of the trench with granite screenings, sand, or small gravel. Thoroughly compact the filler.
Staying in the sun, snow, and rain does not pass without a trace for the wood. In spring and autumn, the pathways need to be maintained. They should be treated with antiseptic and hydrophobic impregnation. It is advisable to seal chips and cracks with a special mastic. If one of the fragments of the structure has rotted or broken, it should be replaced. For this, any log from the woodpile will do.